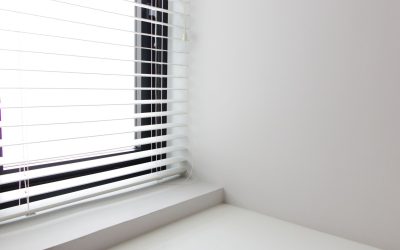
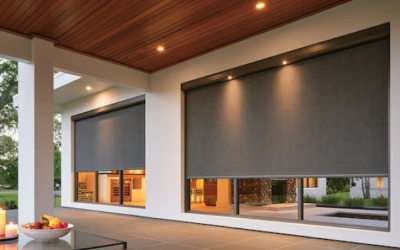
Putting up vertical window blinds can be a simple and rewarding way to upgrade your space. These blinds work great for large windows, sliding glass doors, or even office setups. They provide a good mix of privacy, light control, and a sleek, polished appearance.
📌 Key Takeaways
Learning how to install vertical window blinds starts with accurate measurements and choosing the right inside or outside mounting method.
Gather the correct tools and check all components in the blinds kit before beginning the installation.
Proper bracket placement and alignment help keep the headrail secure and ensure the vanes rotate and slide smoothly.
Test the blinds after installation and make any necessary adjustments to the vanes, brackets, or control mechanism.
Regular dusting, cleaning, and hardware checks can help keep vertical blinds looking and working well for years.
If you’re looking to take on a hands-on job to improve both the look and function of your space, this step-by-step guide will break it down for you. It covers everything from picking the right kind of blinds to how to install and maintain them. Follow these tips to complete your project in 2025.
Why Should You Choose Vertical Window Blinds?
Vertical blinds for windows work great when you want to manage sunlight and keep your privacy. They also give your space a modern and neat appearance. Unlike blinds that move up and down, vertical blinds slide from side to side, making them a good choice for large windows or sliding glass doors.
You can get them in materials like fabric, PVC, vinyl, and faux wood. This way, they can match the style of your room. The slats can spin to let light in while still keeping things private. Plus, they are often simpler to clean than many other kinds of window coverings.
Since the slats hang, there is less dust that collects on them. They also do not bend or crease as much in busy areas of your home. Many people pick them for houses and offices because they combine practicality with long-lasting design.
Tools and Items You’ll Need
Gather everything you need to get started before you begin the installation. Being ready ahead of time helps make sure things go smoothly.
Tools:
- Measuring Tape – Use this to get the exact width and height.
- Pencil – Mark where you’ll drill to keep things organized.
- Level – Helps you mount blinds and brackets.
- Power Drill – Drills holes during the mounting process.
- Drill Bits and Screws – These are used to secure brackets in place.
- Screwdriver – Tighten screws into their proper positions.
- Wall Anchors – Use these when mounting on drywall instead of studs.
Blinds Kit (Comes With):
- Headrail
- Mounting Brackets
- Vertical Vanes (or Slats)
- Valance (a cover that decorates the headrail)
- Carrier Clips
- Wand or Cord Mechanism to operate the blinds
Check your kit to make sure you’ve got all the parts. Missing pieces could hold up your project and might lead to a poor or insecure installation.
Step 1: Measure Your Window the Right Way
Measuring the window is essential. It helps your vertical window blinds look good and work as they should.
Inside Mount:
- Perfect choice to achieve a neat, built-in look.
- Use a steel measuring tape to check the width at the top, middle, and bottom within the window frame.
- Go with the smallest width when placing your order.
- To measure the height, take measurements from top to bottom on the left, center, and right sides. Use the tallest height to ensure accuracy.
- Confirm that the depth of your window recess can fit the headrail.
Outside Mount:
- Use this option if the window recess is too small or if you need more light to be blocked.
- Take the exact width of the space to cover. Include a few extra inches beyond the frame on both sides.
- Measure the height starting from the top spot where you’ll attach the headrail down to where you want the vanes to stop.
- Add 2 to 3 inches to both the width and height to make sure it covers and controls the light.
Step 2: Figure Out Bracket Placement
After measuring, mark where you’ll put the mounting brackets.
To install inside mounts, attach the brackets to the top inner edge of the window frame. To install outside mounts, fix the brackets a few inches above the frame, keeping them far enough apart to cover the window’s entire width.
Mark the placement of the brackets on both sides using a pencil and a level. Make sure both marks are perfectly aligned so the blinds won’t hang crooked. If the headrail isn’t straight, the vanes might have trouble rotating or sliding.
Step 3: Putting Up the Brackets
Once the markings are done, move on to attaching your brackets.
- Drill tiny pilot holes where you marked earlier. This will make screwing in easier and stop the wood from splitting or drywall from cracking.
- If you are not drilling into a stud, put in wall anchors.
- Use screws to secure each bracket in place.
- Grab your level and confirm the brackets are aligned before continuing.
Placing brackets makes sure your window vertical blinds stay mounted and handle the weight of the vanes and hardware without any issues.
Step 4: Mount the Headrail
The headrail is the main piece that holds the control parts and supports the vertical vanes.
- Position the headrail so it lines up with the installed brackets.
- Check your model instructions to either slide or snap the headrail into position.
- Lock it in by either tightening screws in the brackets or using locking clips, depending on how it’s built.
- After securing it, test to see if the carriers inside the rail can move and are set up to hold the vanes.
Step 5: Hang the Vertical Vanes
Now comes the exciting part: putting up the slats!
- Start at one side and work your way across.
- Push each vane into the clip or hook on the carrier until you hear it click in place.
- Check to make sure each vane isn’t crooked and hangs straight down.
- If your blinds come with bottom weights or stabilizing chains, connect those to keep the vanes steady and lined up.
The vanes should all hang, and when you turn them, they need to rotate together as a group.
Step 6: Add the Valance
The valance covers the headrail to give the blinds a neat and polished appearance.
- Attach the supplied clips to the headrail.
- Snap the valance into those clips.
- Make sure it is centered and flush with the wall or window frame before finishing.
The valance improves the look of the blinds and keeps the headrail safe from dust and damage as time goes by.
Step 7: Test and Make Adjustments
Test your installed window vertical blinds to check if they work before calling the job done.
- Open and close the blinds.
- Check if the slats rotate.
- Fix any slats that are out of line.
- If a vane is hard to move or turn, take it off and reconnect it to ensure proper placement.
Testing helps confirm everything is working as it should and lets you sort out small issues before you finish the installation.
Tips to Maintain Your Window Vertical Blinds
Caring for your window vertical blinds is easy and helps them stay in good condition.
- Dust often with a microfiber cloth or a vacuum’s brush tool.
- Clean spots by using mild soap and a damp cloth. If you have fabric vanes, do not soak them or use strong cleaning products.
- Check the hardware every few months to make sure the brackets and headrail feel secure.
- Look at the control mechanism now and then. If needed, add a little lubricant to keep it working.
Taking good care of your blinds keeps them looking good and working well for a long time.
When You Should Call an Expert
Although most people can set up window vertical blinds on their own, there are moments when bringing in a professional is the smarter choice.
- Large or shaped windows
- Tough materials that need specialized tools
- Walls made of concrete or brick
- Not enough time or unsure about using tools
When in doubt, hiring a professional helps you get blinds installed the right way. It makes sure they work look great, and meet safety rules.
Looking Into Alternatives
If you’re thinking about trying different window coverings in your home, check out our fabric blinds for windows. These blinds add a soft look that works well in bedrooms or cozy living areas where you want a touch of warmth or texture.
You can choose blackout or light-filtering styles so you get the right mix of function and decor.
Conclusion
Putting up window vertical blinds can change how your room feels while giving you more control over light and privacy. With proper tools, some preparation, and easy-to-follow steps, you can handle this project and get a polished result.
In 2026, window vertical blinds will remain a classic and functional choice for treating windows, blending style with practicality.
FAQs
-
How to install vertical window blinds correctly?
To install vertical window blinds, measure the window, mark the bracket positions, secure the brackets, attach the headrail, hang the vanes, add the valance, and test the blinds to ensure everything operates smoothly.
-
Can I install vertical window blinds myself?
Yes, vertical blinds are generally suitable for DIY installation when you have the correct tools and follow the manufacturer’s instructions. However, large windows, concrete walls, or unusual window shapes may be better handled by a professional.
-
What tools do I need to install vertical blinds?
You typically need a measuring tape, pencil, level, power drill, appropriate drill bits, screws, screwdriver, and wall anchors when mounting into drywall.
-
Should vertical blinds be installed inside or outside the window frame?
An inside mount provides a neat, built-in appearance when the window recess has sufficient depth. An outside mount is useful when the recess is too shallow or when you want greater light coverage.
-
How do I keep vertical window blinds clean?
Dust the vanes regularly with a microfiber cloth or vacuum brush attachment. For stains, use a damp cloth and mild soap, taking care not to soak fabric vanes.
-
When should I hire a professional to install vertical blinds?
Consider professional installation for unusually large or shaped windows, concrete or brick walls, difficult mounting conditions, or when you are uncomfortable using power tools.